How Do You Photograph Wine Bottles?
Wine bottles look simple to shoot. Stand one up, point a camera at it, done. Anyone who has actually tried it knows better. Glass is one of the most unforgiving subjects in food drinks & beverage photography, and a wine bottle brings extra complications on top of that: curved reflective surfaces, a label that needs to stay readable, and glass that isn't even the same colour or thickness from one bottle to the next.
Packshots still need real lighting work
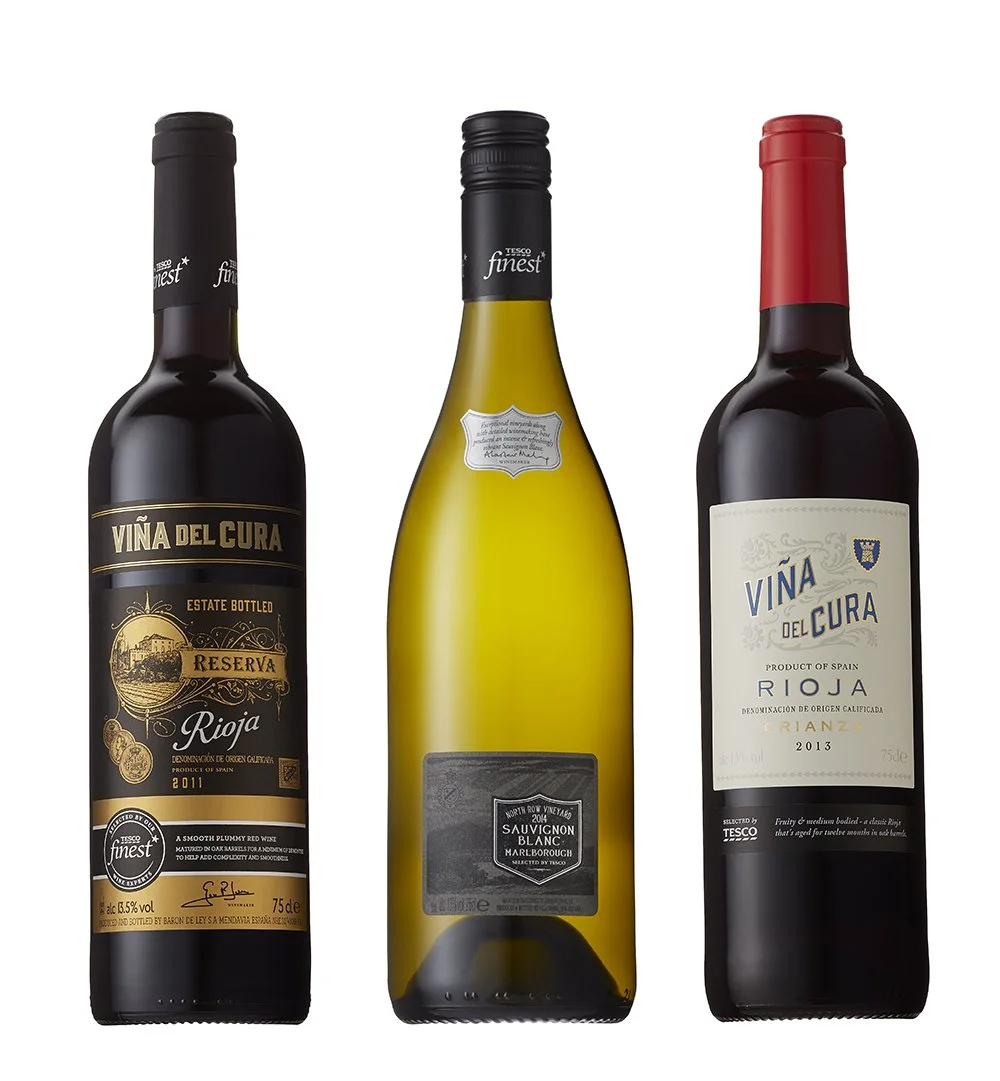
There's a common assumption that a packshot — a plain, clean product-on-white shot — is the "easy" job. Get the product in focus, light it evenly, done in ten minutes. With wine bottles, that assumption falls apart fast.
The glass is reflective on the front, which means every light source, softbox edge, and even the camera can show up as an unwanted highlight or a ghostly reflection across the surface. At the same time, the bottle needs light coming through it from behind to bring out the colour and depth of the glass and the liquid inside. So you're not lighting one surface, you're managing light that's bouncing off the front and passing through from the back at the same time — and both have to look intentional, not accidental.
Every bottle behaves differently
This is where a lot of photographers get caught out. A pale green Riesling bottle and a deep, almost opaque Burgundy-style bottle for a red wine do not respond to the same lighting setup. Darker glass absorbs far more light, so it often needs a stronger or closer backlight to show any translucency at all. Lighter glass can flare and blow out with the same amount of light that barely registers on a darker bottle.
There's no single "correct" power setting you can dial in once and reuse across a whole range. Each bottle, sometimes even each vintage from the same producer, needs a quick test shot and a lighting adjustment. Treat every bottle as its own small lighting problem rather than assuming what worked on the last one will work again.
Backlighting is what gives the glass its life
A flat, front-only lit bottle tends to look dull — the glass reads as a solid, characterless shape rather than something you can see into. Placing a light source behind the bottle, usually diffused through a translucent panel or a light table, lets the glass and the wine glow slightly rather than sitting there as a dark silhouette.
The trick is balance. Too much light from behind and the label starts to look washed out or the wine loses its rich colour. Too little and you're back to a flat, front-lit shape with none of the depth that makes a wine photo look premium. It usually takes a handful of test exposures, checking histograms and reviewing on a calibrated screen, before the front and back light are actually working together instead of fighting each other.
Strip lights are the tool of choice
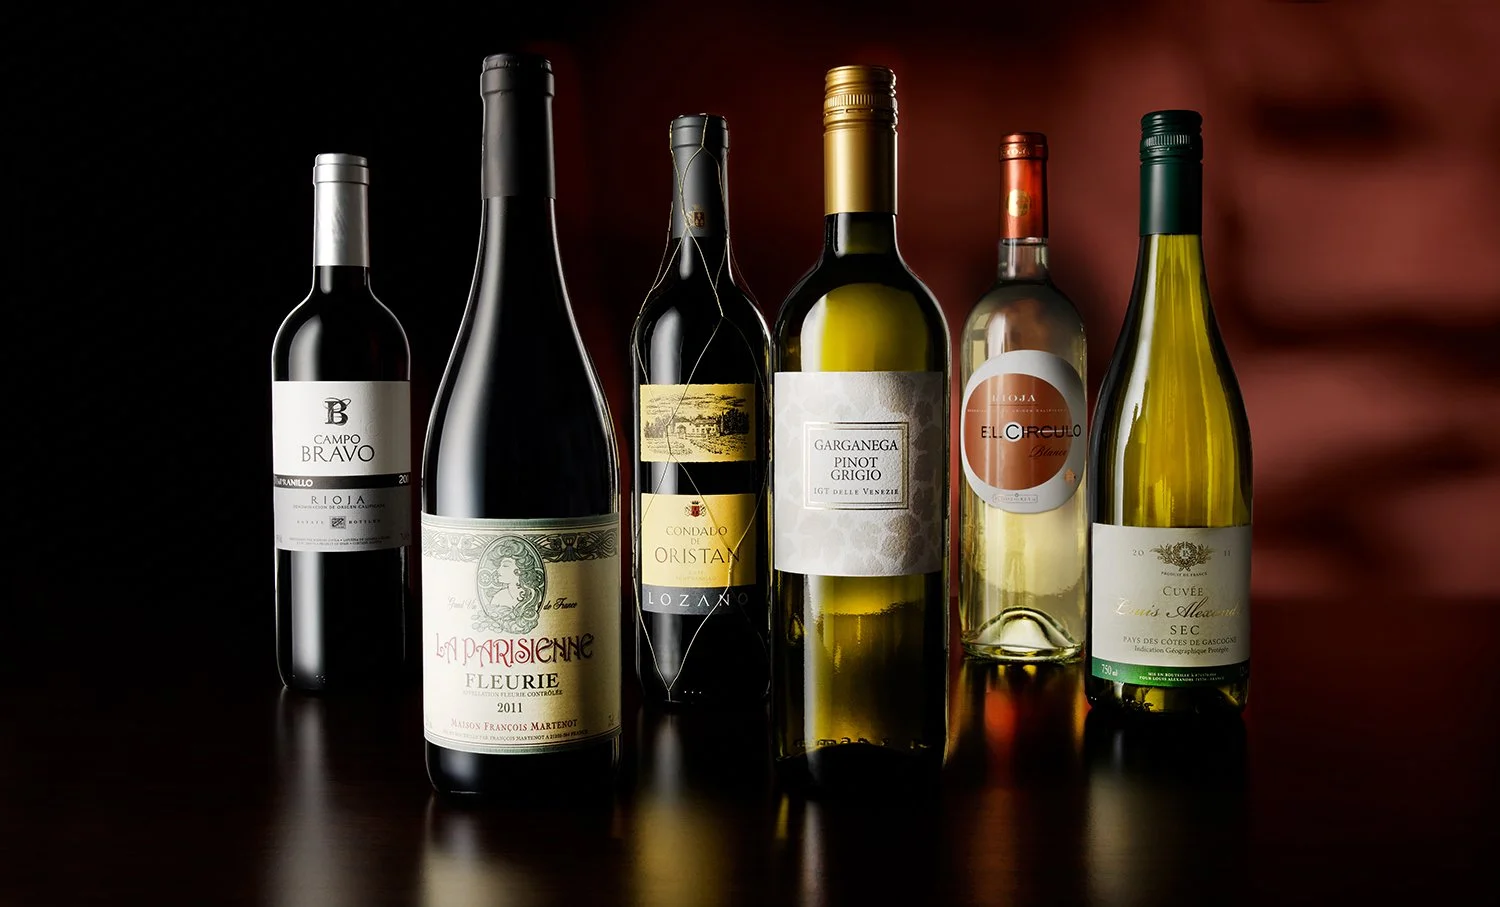
For the backlight itself, most photographers reach for a strip light rather than a standard softbox. A tall, narrow strip softbox — or a dedicated light strip like the Broncolor Striplite — gives a long, even column of light that matches the shape of a bottle far better than a square or octagonal light source would. The narrow spread also makes it easier to control where the light falls, which matters when you're already fighting reflections on the front of the glass.
Diffusion is just as important as the light itself. How much diffusion material you put in front of the strip and the distance of the light source determines how hard or soft the light is by the time it reaches the bottle. Less diffusion gives a harder, more defined edge of light with more contrast, which can suit a bottle where you want the outline and label crisp. More diffusion spreads the light out and softens it, giving a gentler gradient through the glass and a more forgiving transition across curved surfaces. Neither is automatically "right" — it depends on the bottle's glass colour and how much punch you want in the final image, so it's worth testing a couple of diffusion layers before settling on the shot.
Controlling flare with black card
Once the backlight is in place, a new problem shows up: flare and stray reflections creeping in along the curved edges of the bottle. Glass edges act almost like a lens themselves, catching light from angles you didn't intend and throwing it straight into the camera as a hot streak or a soft glow where you don't want one.
The fix is low-tech but effective. Black card, cut into strips or flags, positioned just outside the frame along the edges of the bottle, blocks that spill before it ever reaches the glass. It's a small adjustment, but it makes the difference between a bottle with crisp, clean edges and one with a distracting halo running down the side. Most photographers build a simple "tunnel" of black card and flags around the set, adjusting position shot by shot until the reflections disappear without cutting into the highlights you actually want.
The takeaway
Photographing wine bottles and other glass and drinks products isn't really about the camera settings — it's about controlling reflective glass from every angle at once. Front lighting has to sit alongside backlighting, the amount of light needs adjusting bottle by bottle depending on glass colour and thickness, a strip light with the right amount of diffusion shapes how hard or soft that light looks, and black card along the edges keeps flare from ruining an otherwise clean shot. Get those things right and even a "simple" packshot starts to look like it belongs on a wine list.